API Performance Testing using k6

Early on in my career, I was working on an e-commerce site.
Everything was going fine, features were being delivered, and everything seemed to work in production.
Until the equivalent of Black Friday came to Kazakhstan.
First, the site was slow.
Then, it was an error 503 Site not Available
Then after a few minutes or so, the site magically worked.
Then fell down again.
I remember that day very well, everyone was panicking because our biggest client (the e-commerce company) is about to drop us for this failure.
Little did I know back then that this was easily preventable.
Today you will learn:
- Main concepts of performance testing.
- Implementing API performance tests using k6.
- Analyzing k6 performance results.
What is Performance Testing?
What I forgot back then was the existence of something called Performance Testing.
But what's that?
Performance testing is part of the non-functional testing group which investigates the behaviour of a system under various traffic conditions, using tools that simulate end-user activities.
PS. Non-Functional testing is a type of software testing to check non-functional aspects of a software application. So this includes things such as performance, usability, reliability, etc...
Why should you test the performance of the system?
Well, the short answer is to avoid the scenario we had earlier where a spike of users broke our system.
The long answer is for a slightly different question. The question that you wanted to ask is, "How do I convince management to spend more time on performance testing?"
Well, let's talk about the business benefits of performance testing.
- User Satisfaction – Slow apps are just not usable in this day and age, so if your system is slow then lots of money is being lost.
- Speed and Stability – Performance tests ensure that even with a user spike, your system's functionality is still running smoothly.
- Logs and Monitoring – You can easily identify bottlenecks and areas to improve upon.
Types of Performance Testing
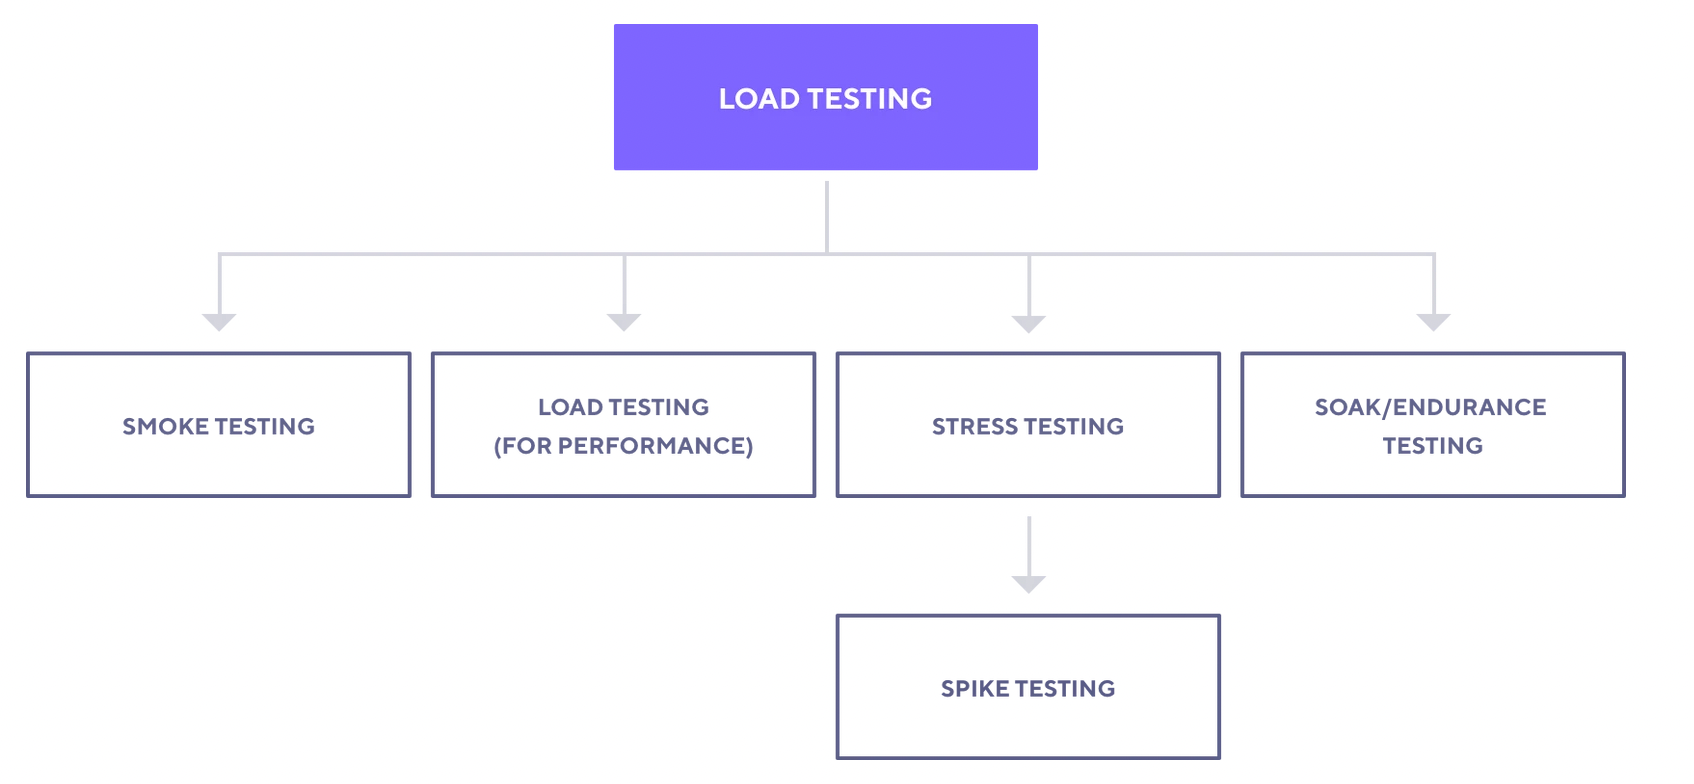
Performance testing is separated into several different types, each designed for a specific purpose.
- Smoke Testing – This test is used to check if your system can handle the minimum user load without any problems.
- Load Testing – This test evaluates system performance in terms of a specific (expected) number of concurrent users or requests per second.
- Stress Testing and Spike Testing – These tests help assess the limits of your system and stability under extreme conditions.
- Soak/Endurance Testing – This test tells you about the reliability and performance of your system over an extended period of time.
Performance Tests Workflow
The workflow for performance tests varies widely but the main objective stays the same. The generic workflow goes like this.

- Identify Test Environment – Figure out what you wanna test and what tools are available. Try to figure everything out beforehand because the devil is in the details. This will help you create more efficient tests and figure out potential challenges that you may encounter during performance tests.
- Determine Performance Criteria – Figure out your goals and constraints for throughput, response times and resource allocation. This is something that you and your team should do together. An easy way to set performance criteria is to find a "performant" similar application and use that as your benchmark.
- Plan and Design – Plan and design your different test cases. It will help if you already have some monitoring on production to know how many users you have. If not then, you have to eyeball it for now.
- Configure Test Environment – You wouldn't want to run things directly on production, I would prefer to have a performance test environment which essentially is a copy of production.
- Implement Test Design – Create the performance tests according to your test design.
- Run Tests – Execute and monitor the tests.
- Analyse, Finetune, and Re-Test – Consolidate, analyze and share test results. Then fine-tune and test again to see if there is an improvement or decrease in performance. Since improvements generally grow smaller with each retest, stop when bottlenecking is caused by the CPU. Then you may have the consider option of increasing CPU power.
API Performance Testing with k6
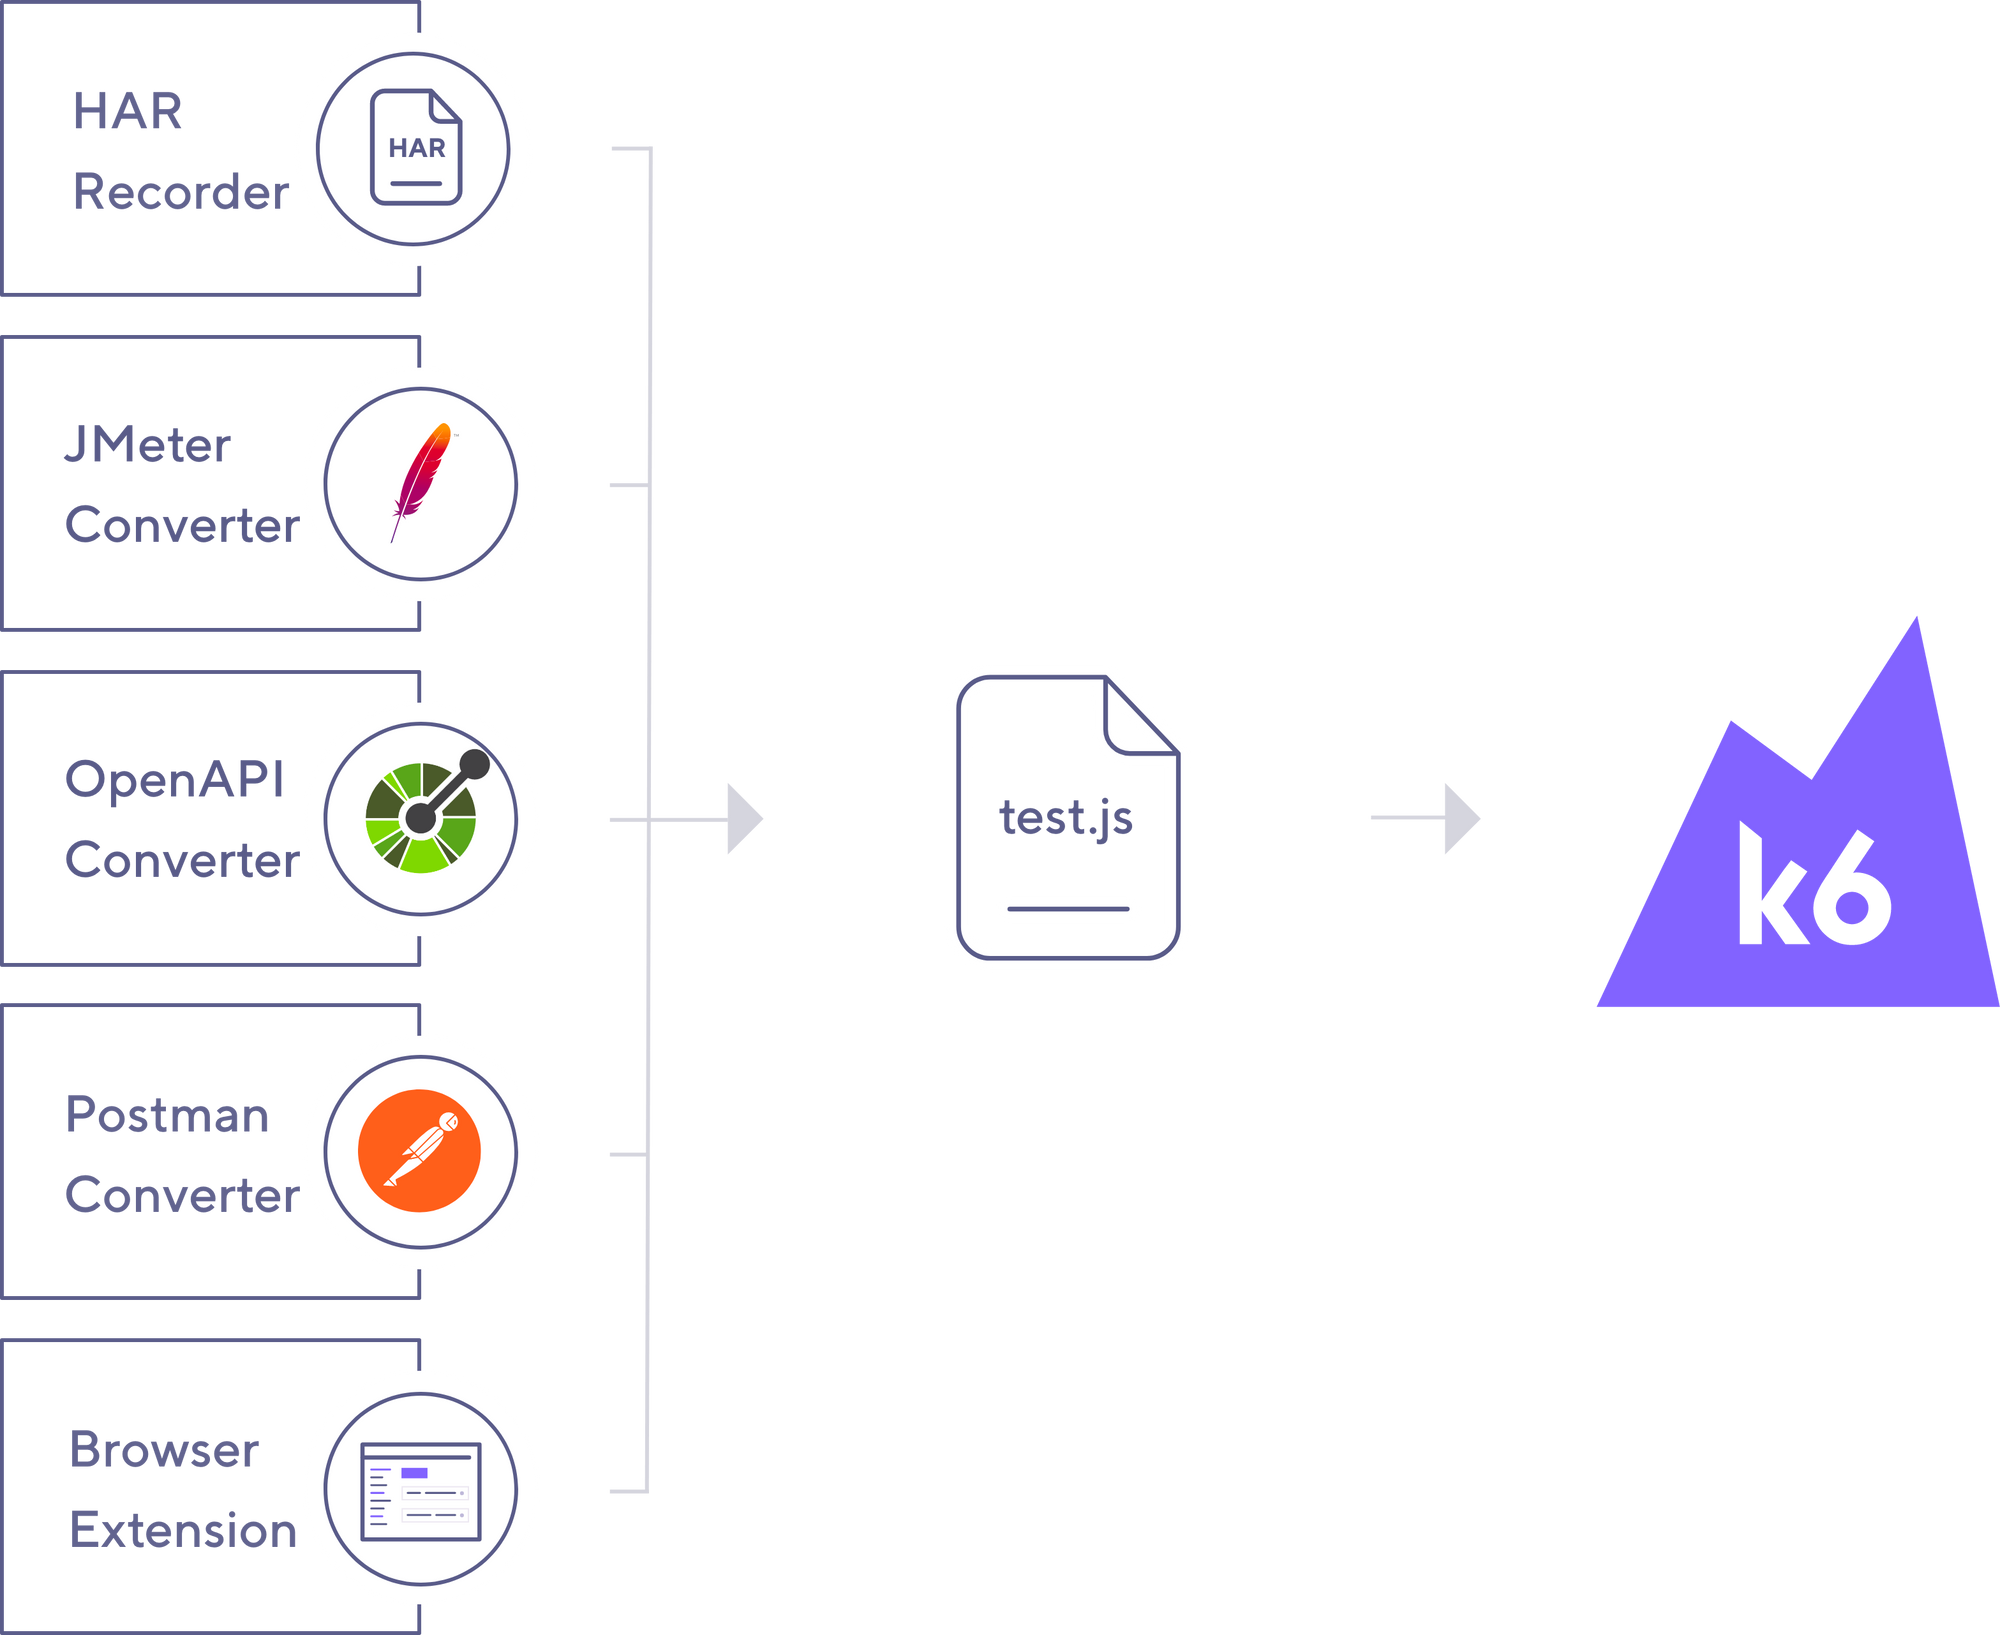
In the performance testing world, there are many different tools but one reigns upon them, that tool is k6.
K6 works on multiple platforms, if you are on a mac, you can easily install it using homebrew.
brew install k6k6 also has packages for Linux and Windows. Alternatively, you can use a Docker container or a standalone binary.
To learn more, follow this link.

Writing our tests
Let's write our first tests.
For this example, we will be testing the public REST APIs that https://gorest.co.in/ provides.
We will only test one route which is the GET /users route.
To begin, let's create a new directory.
mkdir k6-demo
cd k6-demo/
In this directory, we will have a test-script.js file.
// test-script.js

import http from "k6/http";
import { check, sleep } from "k6";

// Common things
const API_URL = "https://gorest.co.in/public-api";
const API_TOKEN = "YOUR_API_TOKEN";

// Test setup
export let options = {
    vus: 1,
    duration: '30s'
};

// Test scenario
export default function () {

    const params = { headers: { "Authorization": `Bearer ${API_TOKEN}` } };

    let response = http.get(
        `${API_URL}/users`,
        params
    );

	check(
        response,
        { "Check that response status code is 200": (r) => r.status == 200 }
    );


    sleep(0.5);
}
In k6 there is this concept of virtual users, it's essentially a simulation of a user. The configuration of our test is stored in the options object and it says that we have one virtual user that will be calling the API for 30 seconds.
The main code is in our default function that all our virtual users will go through. We also check that the response is 200 using the check method.
PS. As you may have noticed, we didn't explicitly install the k6 packages. We will run our tests using the k6 command that has all the required packages installed.
Running and Analyzing our Tests
To run this test, run the following command.
k6 run test-script.jsYou will then see the results of the tests.
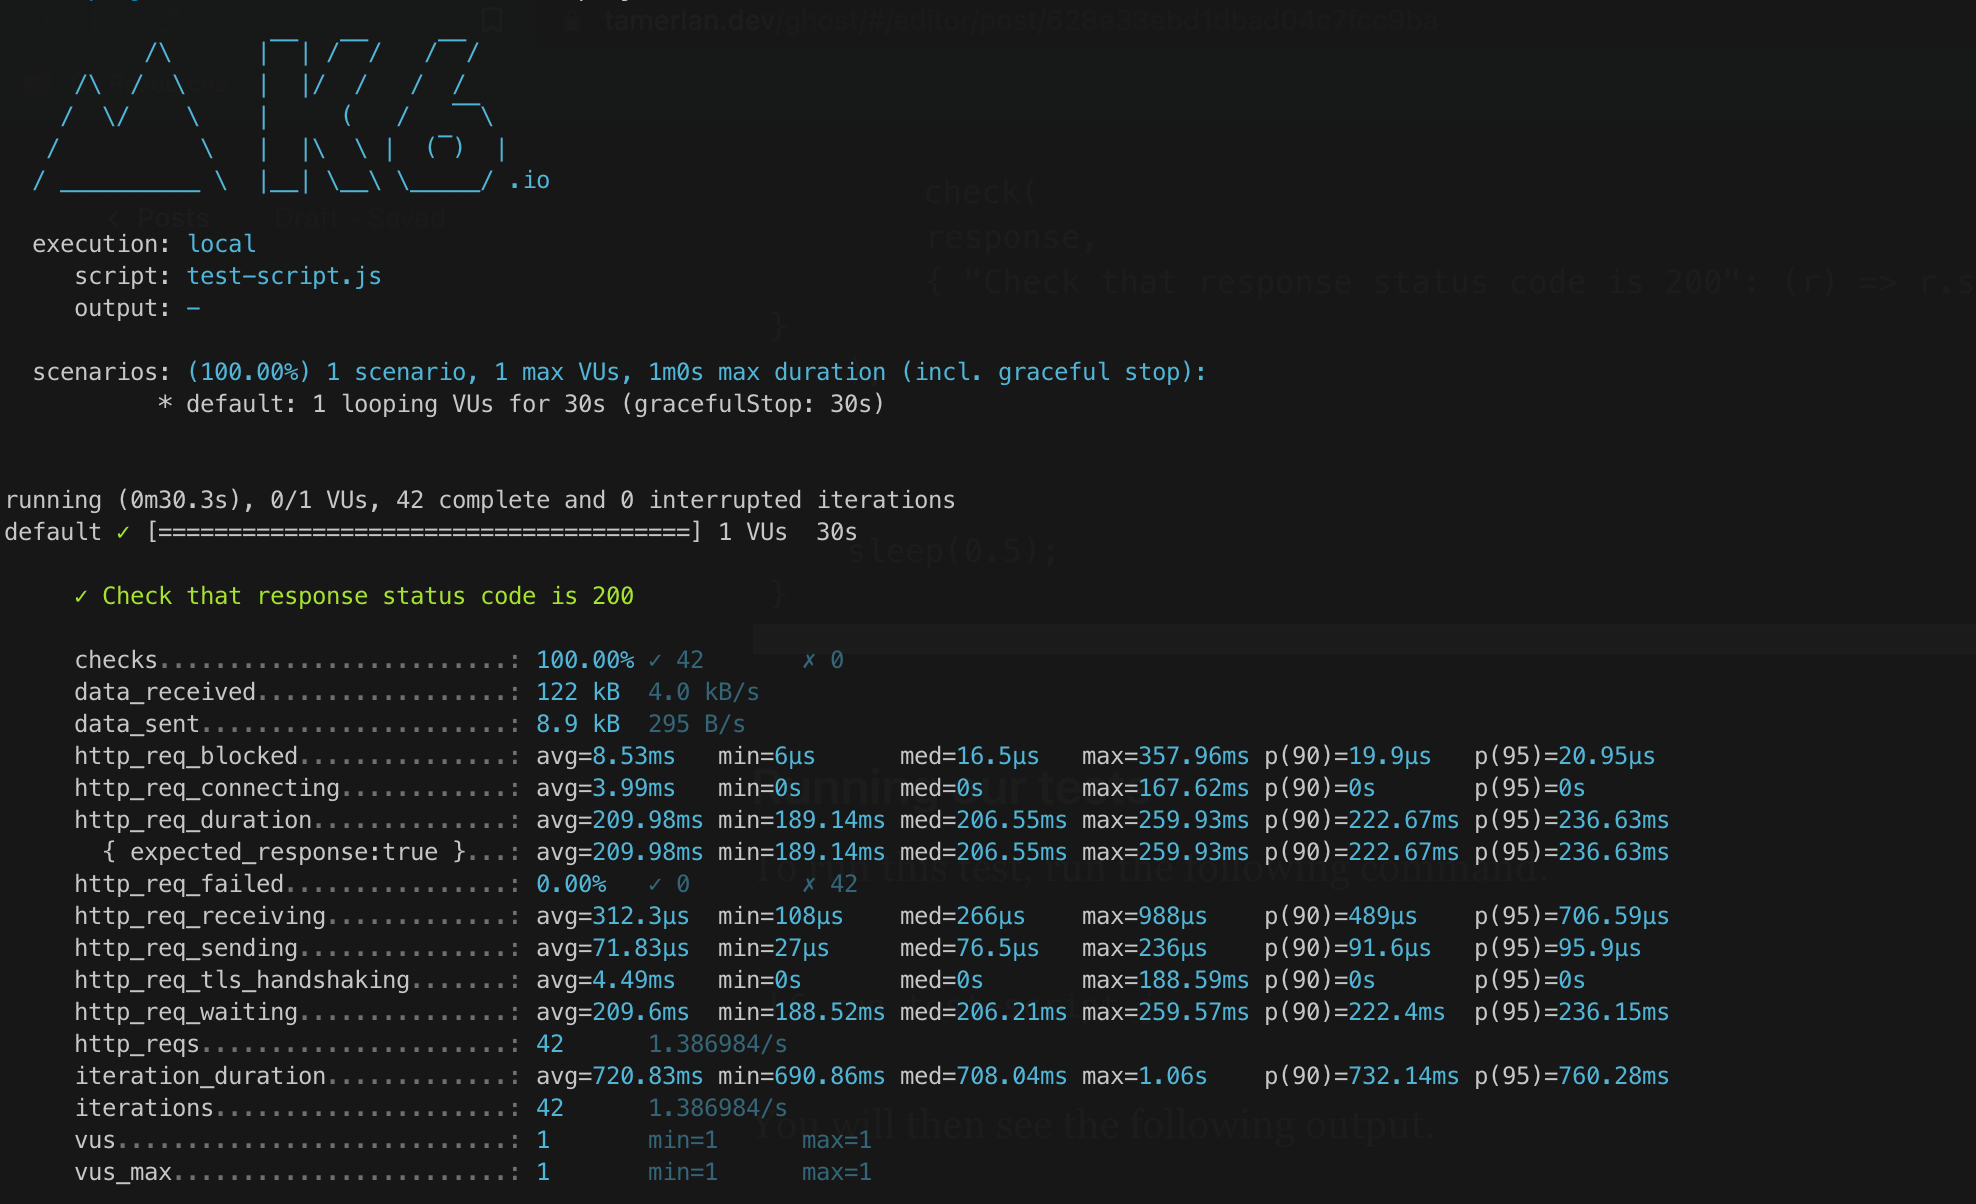
The main points of information are the number of virtual users, duration and the statuses of the tests.
There is an interesting metric which is the http_req_duration and it's p(90) and p(95). It shows the average duration of the HTTP request for 90% and 95% of all durations. This is better than the average value because it may be susceptible to extremes, so the 90th and 95th percentiles much better reflect the actual performance state of the tested application.
Conclusion
This test above was done with 1 virtual user. To mimic the production environment, you have to check your traffic and adjust the options to the appropriate number of virtual users.
If you don't have any statistics on the number of users that are using your service, then you can start with a baseline number (let's say a 100) and slowly test the system, if everything works well then increase the number of virtual users till something breaks.
This way you will know the current performance of your system, and the team will assess whether it is satisfactory or whether further optimizations are required.
This has been a fun topic to research, I hope you learned something today and as always, thanks for reading.
No spam, no sharing to third party. Only you and me.
Member discussion