CI/CD Pipelines with Github Actions and Django
Deployment is hard.
You have to make sure that you are in the correct environment, with the correct variables, and finally, run the correct commands in order.
Other things are hard too, like keeping code quality high with consistent testing, and linting.
These kinds of things should be done automatically.
Fortunately, we have already solved this problem with CI/CD pipelines.
But before we go on in implementing these pipelines using GitHub Actions, let's go over the theory first.
What is CI/CD?
CI/CD allows us to ship our application frequently by introducing automation.
There are three main attributes to CI/CD:
- Continuous Integration
- Continuous Delivery
- Continuous Deployment
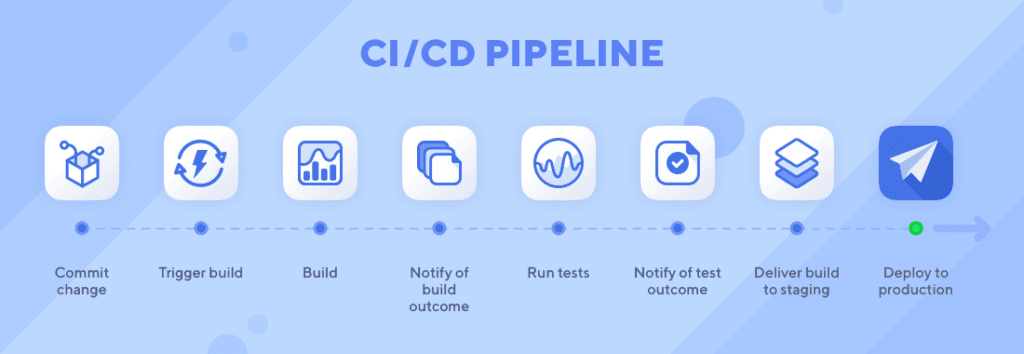
All these together make up the "CI/CD Pipeline"
But what's the difference between them?
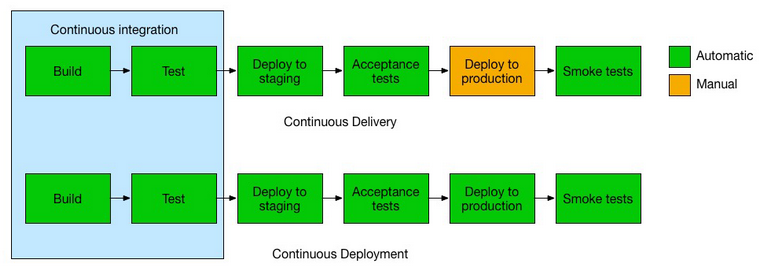
CI which stands for continuous integration means that new code is built, tested, and pushed automatically to the appropriate branch. For example, let's say you have a production branch, you can set up a CI pipeline to automatically build, test and push the app to the production repository every time new changes are committed.
CD which stands for continuous delivery/deployment automizes the next stages of our app, which is deployment to production.
Here's a nice illustration that explains the difference:
What is GitHub Action?
Now that we know the theory behind CI/CD, let's implement them.
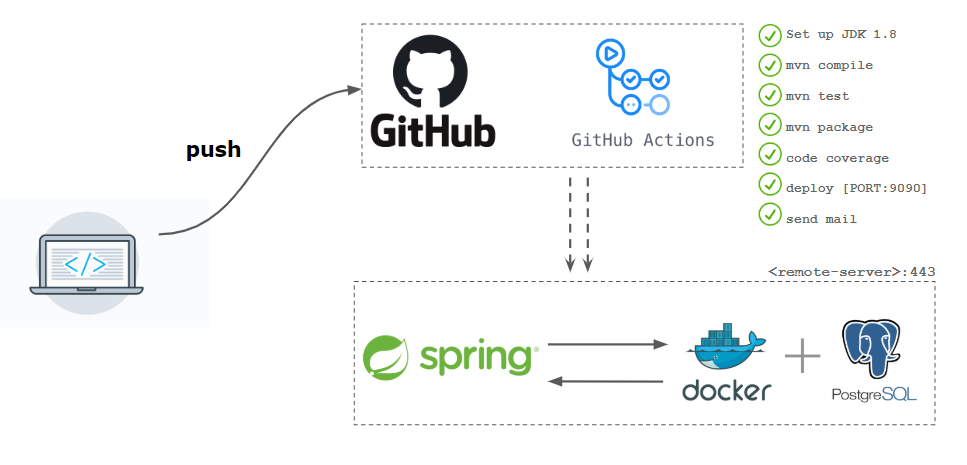
But to do that we have to use some tool that allows us to easily create CI/CD pipelines. The one that we are going to use is called GitHub Actions.
Github Actions is an easy to use tool that helps us to automize recurring tasks.
A pipeline or workflow in GitHub Actions are broken down into several components:
- Events – It's a specific activity that triggers a workflow. For example, when someone pushes a commit to the production branch, then you would want the deployment workflow to run.
- Jobs – A job is a set of steps that gets run on the runner.
- Steps – A step is either a shell script or some action that will be run. Steps are executed in order and are dependent on each other. All steps get to run on the same runner so you can share data between them.
- Actions – Sometimes a task can be a pain in the ass to run, for example, to pull a private git repo, you first need to login through GitHub-CLI and then pull the repo. Github actions alleviate that by allowing users to create reusable actions that can be used by anyone. This is like Docker Hub or GitHub but with a category of different actions, you can have.
- Runners – A runner is a server that runs your workflow. They are provided by GitHub and can be configured to run on different platforms such as Windows, Linux and macOS.
Sample App
Now that we know the theory behind how GitHub actions work, let's create a sample app that will run tests and check for linting errors on pull requests to our main branch.
Creating a Django Project
This is the usual Django set up so I will quickly go through it.
Let's set up our environment first.
mkdir django-github-actions-demo
cd django-github-actions-demo
python3 -m venv venv
source venv/bin/activate

pip install django
pip install flake8

pip freeze > requirements.txt
With all the dependencies installed, let's initialize our project and create a sample app.
django-admin startproject demo
python manage.py startapp sample_app
Also, don't forget to initialize git with:
git init Setting up Pipelines
Once you have that setup, let's create our workflow.
All workflows are created using a simple YAML file and are stored in the .github/workflows folder.
It's pretty intuitive, so simply create a file called django.yml in .github/workflows
name: Django CI

on:
  push:
    branches: [ main ]
  pull_request:
    branches: [ main ]

jobs:
  build:

    runs-on: ubuntu-latest
    strategy:
      max-parallel: 4
      matrix:
        python-version: [3.7, 3.8, 3.9]

    steps:
    - uses: actions/checkout@v2
    - name: Set up Python ${{ matrix.python-version }}
      uses: actions/setup-python@v2
      with:
        python-version: ${{ matrix.python-version }}
    - name: Install Dependencies
      run: |
        python -m pip install --upgrade pip
        pip install -r requirements.txt
    - name: Lint with Flake8
      run: |
        flake8 .
    - name: Run Tests
      run: |
        python manage.py test
Don't worry this is simple. Let's break it down.
- We first start with the name of the workflow in our case it's called Django CI.
- We then describe our events, when do we want this workflow to run. In our case, it will be run when we make a pull request to the main branch or directly push to the main branch.
- We then describe our jobs, we tell GitHub that we want the job to run on the latest ubuntu server and tell it to run three versions of the jobs with different python versions. In our case, it's python 3.7, 3.8, and 3.9.
- Next comes the steps of the job. We have in total 5 steps, two of them are actions and three are shell commands. The two actions simply do the usual pull from the repo and set up the python environment. In the next three steps, we simply install dependencies, run the lint command, and run the test command. If any of these steps fail, then we will be notified on GitHub.
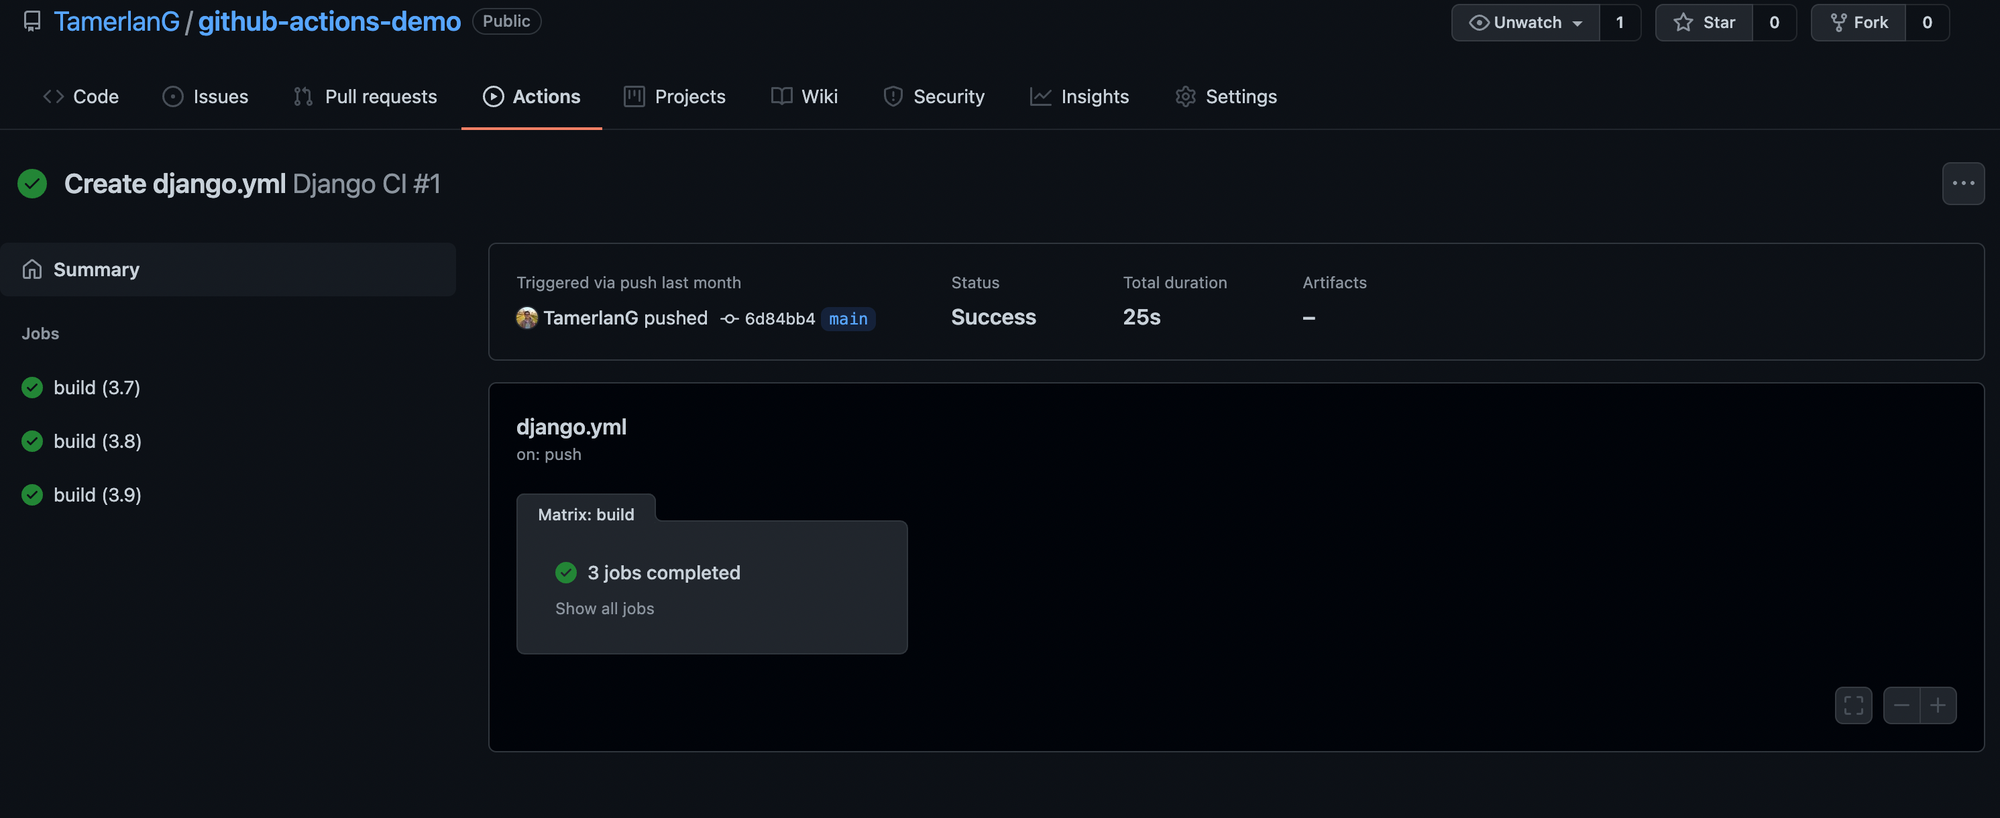
Once we push this on GitHub we should see it automatically running.
Conclusion
The beauty of development is that you can automate a lot of things. CI/CD pipelines help us do that. From deployments to testing, there are many different things you can automate.
Here's an interesting exercise:
- Go to some open source project
- Read their pipeline code
This will tell you the different tasks they have and how they try to adhere to quality standards. Bonus points, it will also teach you best practices.
Thanks for Reading.
No spam, no sharing to third party. Only you and me.
Member discussion