
A Complete Guide to Setting Up Testing in Neovim with Neotest
One of my favourite features of VSCode is the ability to view and run my tests directly from the UI.
It's not just about the UI; it's about having the flexibility to choose and run specific tests using shortcuts—without relying on the terminal.
I liked that flow and wanted something similar in Neovim.
Hail the Community 🚀
After some heavy research—just kidding! If you Google 'Neovim testing,' the first link will take you to a plugin called Neotest.
Neotest is a plugin that helps you interact with your tests. It follows an adapter architecture, meaning you install the core plugin (neotest), and then add an adapter for your specific test framework.
For example, if you're in the JavaScript ecosystem and use Jest as your test framework, you would install neotest and neotest-jest.
Installing and Configuring Neotest
In this tutorial, we'll use lazy.nvim as our package manager. Here's how to install Neotest:
{
  "nvim-neotest/neotest",
  event = { "BufReadPost", "BufNewFile" },
  dependencies = {
      "nvim-neotest/nvim-nio",
      "nvim-lua/plenary.nvim",
      "antoinemadec/FixCursorHold.nvim",
      "nvim-treesitter/nvim-treesitter",
      "nvim-neotest/neotest-jest",
  },
},
As you can see, we have some dependencies. The only required ones are nvim-nio and plenary.nvim. Most adapters will also require treesitter, so we include that as well.
Neotest relies on the CursorHold event, which uses the updatetime setting. By default, this setting is quite high, and lowering it may lead to excessive writes to disk.
It's recommended to use the plugin FixCursorHold which allows detaching updatetime from the frequency of the CursorHold event.
FixCursorHold, the repo claims it is no longer needed but it is still recommended to use (See this issue) Finally, we have our first adapter installed for the JavaScript testing framework Jest called neotest-jest
Quit and reopen Neovim to install your new plugins.
Configuring Neotest and Neotest-Jest
The next step is to configure Neotest. The default configurations work well, but you must do some extra work to set up your adapters. Here's my current setup:
local status_ok, neotest = pcall(require, "neotest")
if not status_ok then
  return
end

local jest = require("neotest-jest")

neotest.setup({
  summary = {
      open = "botright vsplit | vertical resize 80",
  },
  adapters = {
      jest({
          jestCommand = "npm test --",
          cwd = function(path)
              return vim.fn.getcwd()
          end,
      }),
  },
})
There isn't anything special here. I configured the test summary page to be a bit bigger and added some basic configuration for neotest-jest.
neotest-jest, check it out here.Setting Up Keymaps
The final step is setting up keymaps. I'm on the Folke hype train, so I'm using which-key.nvim to create my keybindings.
You don't have to follow my exact setup, but I hope it inspires you to create your own:
{
  -- Neotest related mappings
  {
      "<leader>n",
      group = "🧪 Test",
      nowait = true,
      remap = false,
  },
  {
      "<leader>nr",
      "<cmd>lua require('neotest').run.run()<cr>",
      desc = "Run nearest test",
  },
  {
      "<leader>nf",
      "<cmd>lua require('neotest').run.run(vim.fn.expand('%'))<cr>",
      desc = "Run current file",
  },
  {
      "<leader>na",
      "<cmd>lua require('neotest').run.run({ suite = true })<cr>",
      desc = "Run all tests",
  },
  {
      "<leader>nd",
      "<cmd>lua require('neotest').run.run({strategy = 'dap'})<cr>",
      desc = "Debug nearest test",
  },
  {
      "<leader>ns",
      "<cmd>lua require('neotest').run.stop()<cr>",
      desc = "Stop test",
  },
  {
      "<leader>nn",
      "<cmd>lua require('neotest').run.attach()<cr>",
      desc = "Attach to nearest test",
  },
  {
      "<leader>no",
      "<cmd>lua require('neotest').output.open()<cr>",
      desc = "Show test output",
  },
  {
      "<leader>np",
      "<cmd>lua require('neotest').output_panel.toggle()<cr>",
      desc = "Toggle output panel",
  },
  {
      "<leader>nv",
      "<cmd>lua require('neotest').summary.toggle()<cr>",
      desc = "Toggle summary",
  },
  {
      "<leader>nc",
      "<cmd>lua require('neotest').run.run({ suite = true, env = { CI = true } })<cr>",
      desc = "Run all tests with CI",
  },
}
Running Tests in Neovim
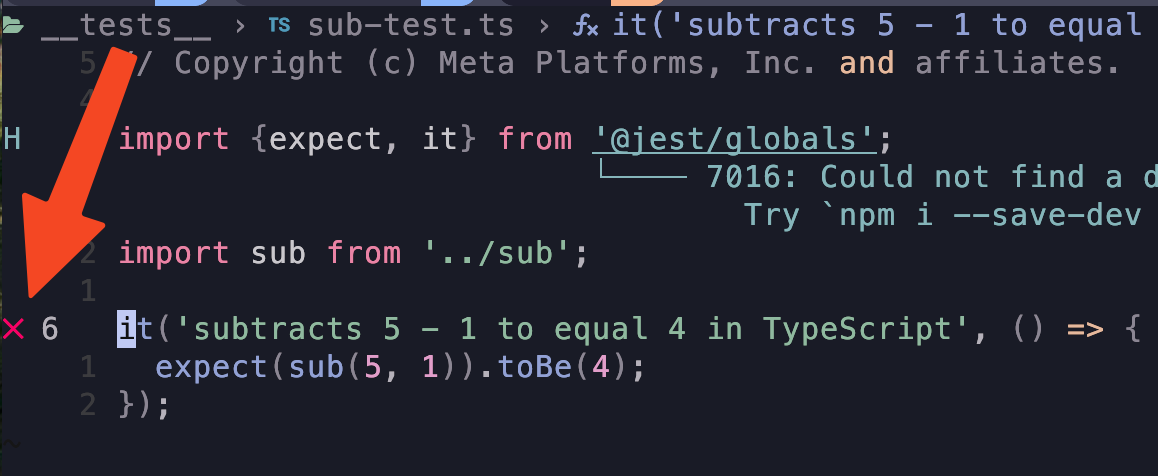
Now that we have everything installed and configured, let's see it in action. The test I will use for this tutorial comes from the official Jest repo. Here's my current test:
// Copyright (c) Meta Platforms, Inc. and affiliates.

import {expect, it} from '@jest/globals';
import sub from '../sub';

it('subtracts 5 - 1 to equal 4 in TypeScript', () => {
  expect(sub(5, 1)).toBe(4);
});
If we want to run this test, we can use the keymap <leader>nr, which finds and runs the nearest test.
Seems like our test has failed and showed us something like this:
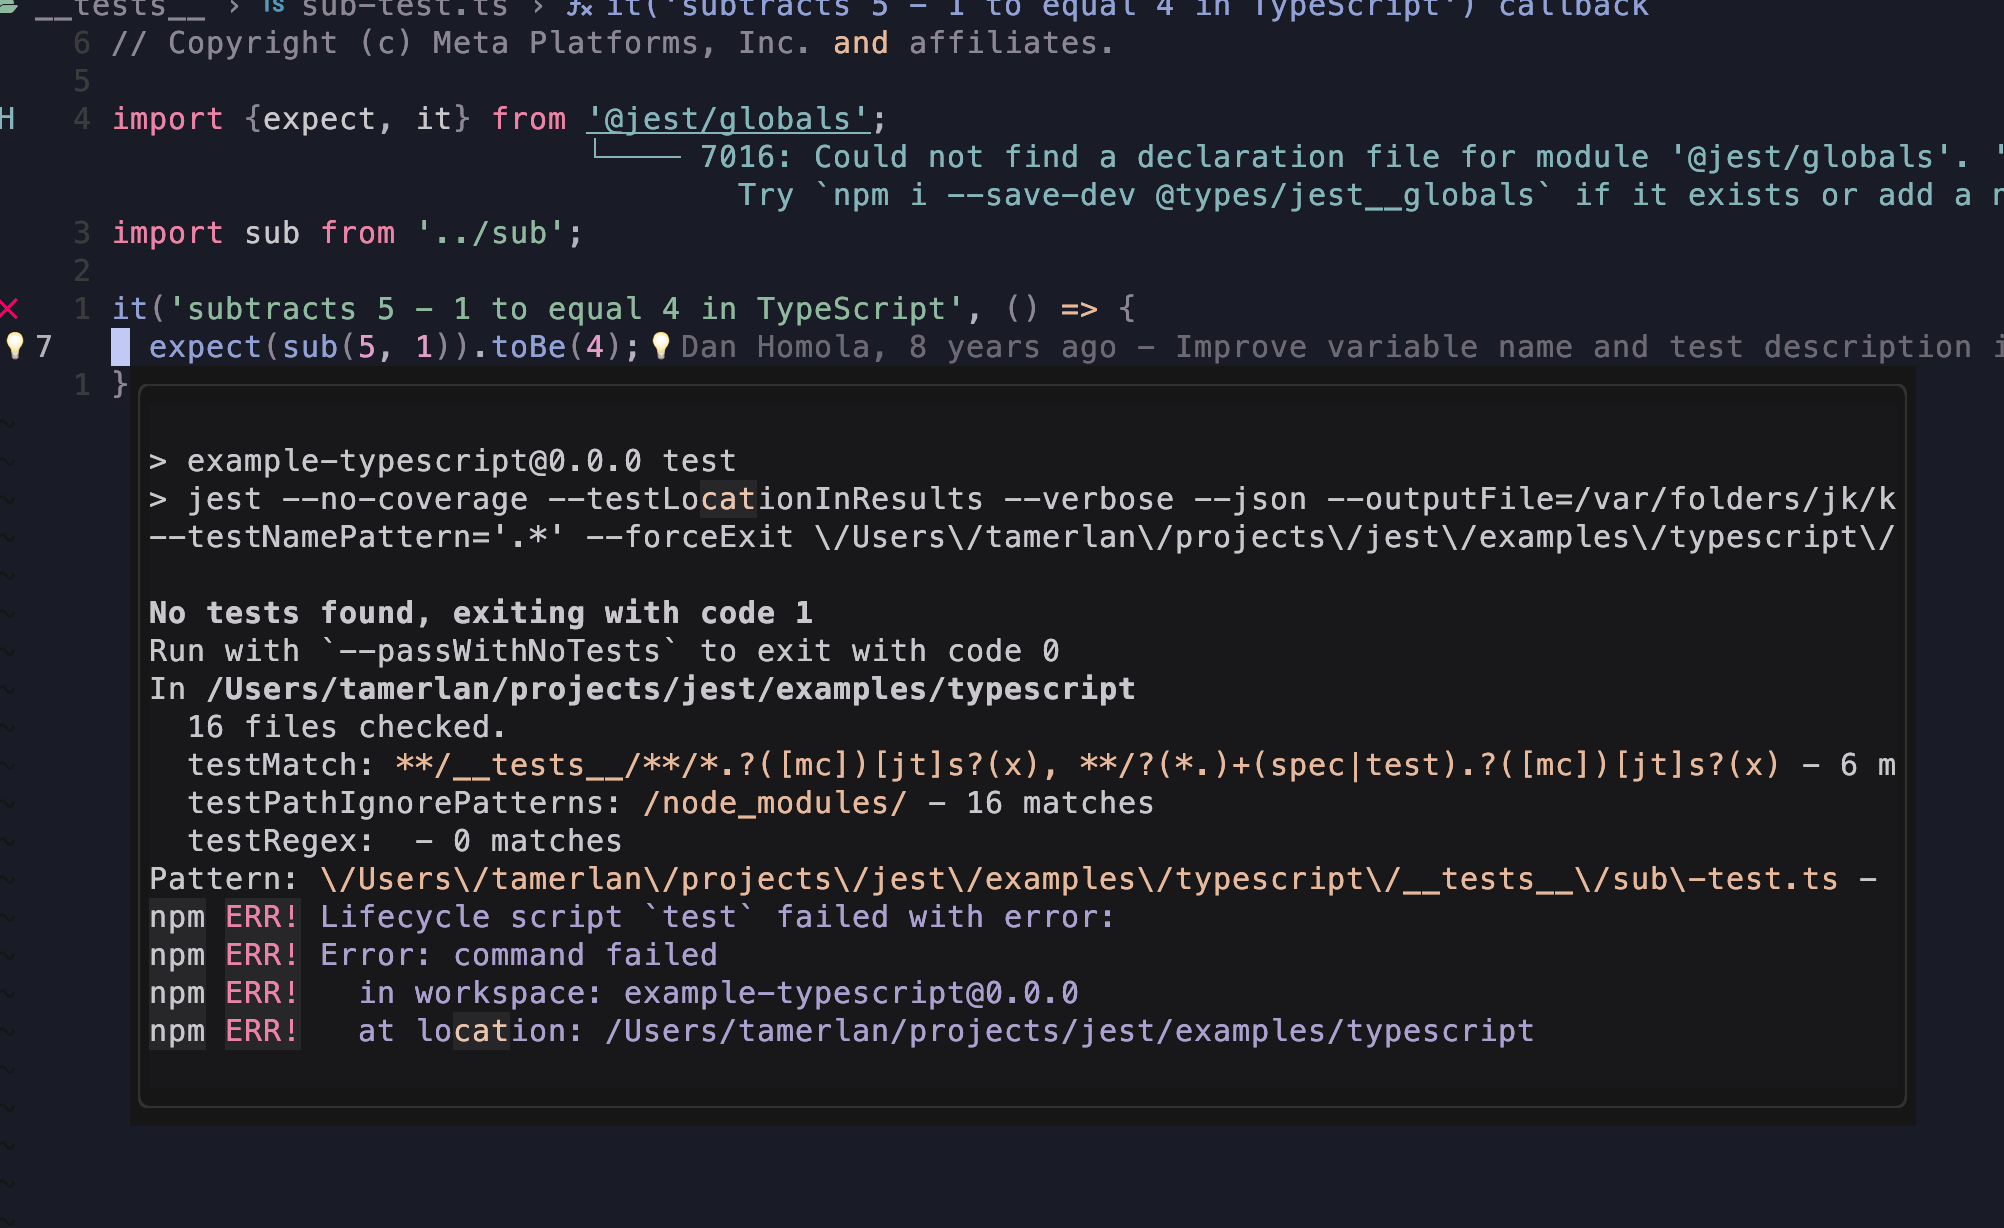
If I want to see what's wrong, I can check the output by using the command <leader>no. This is how it looks:
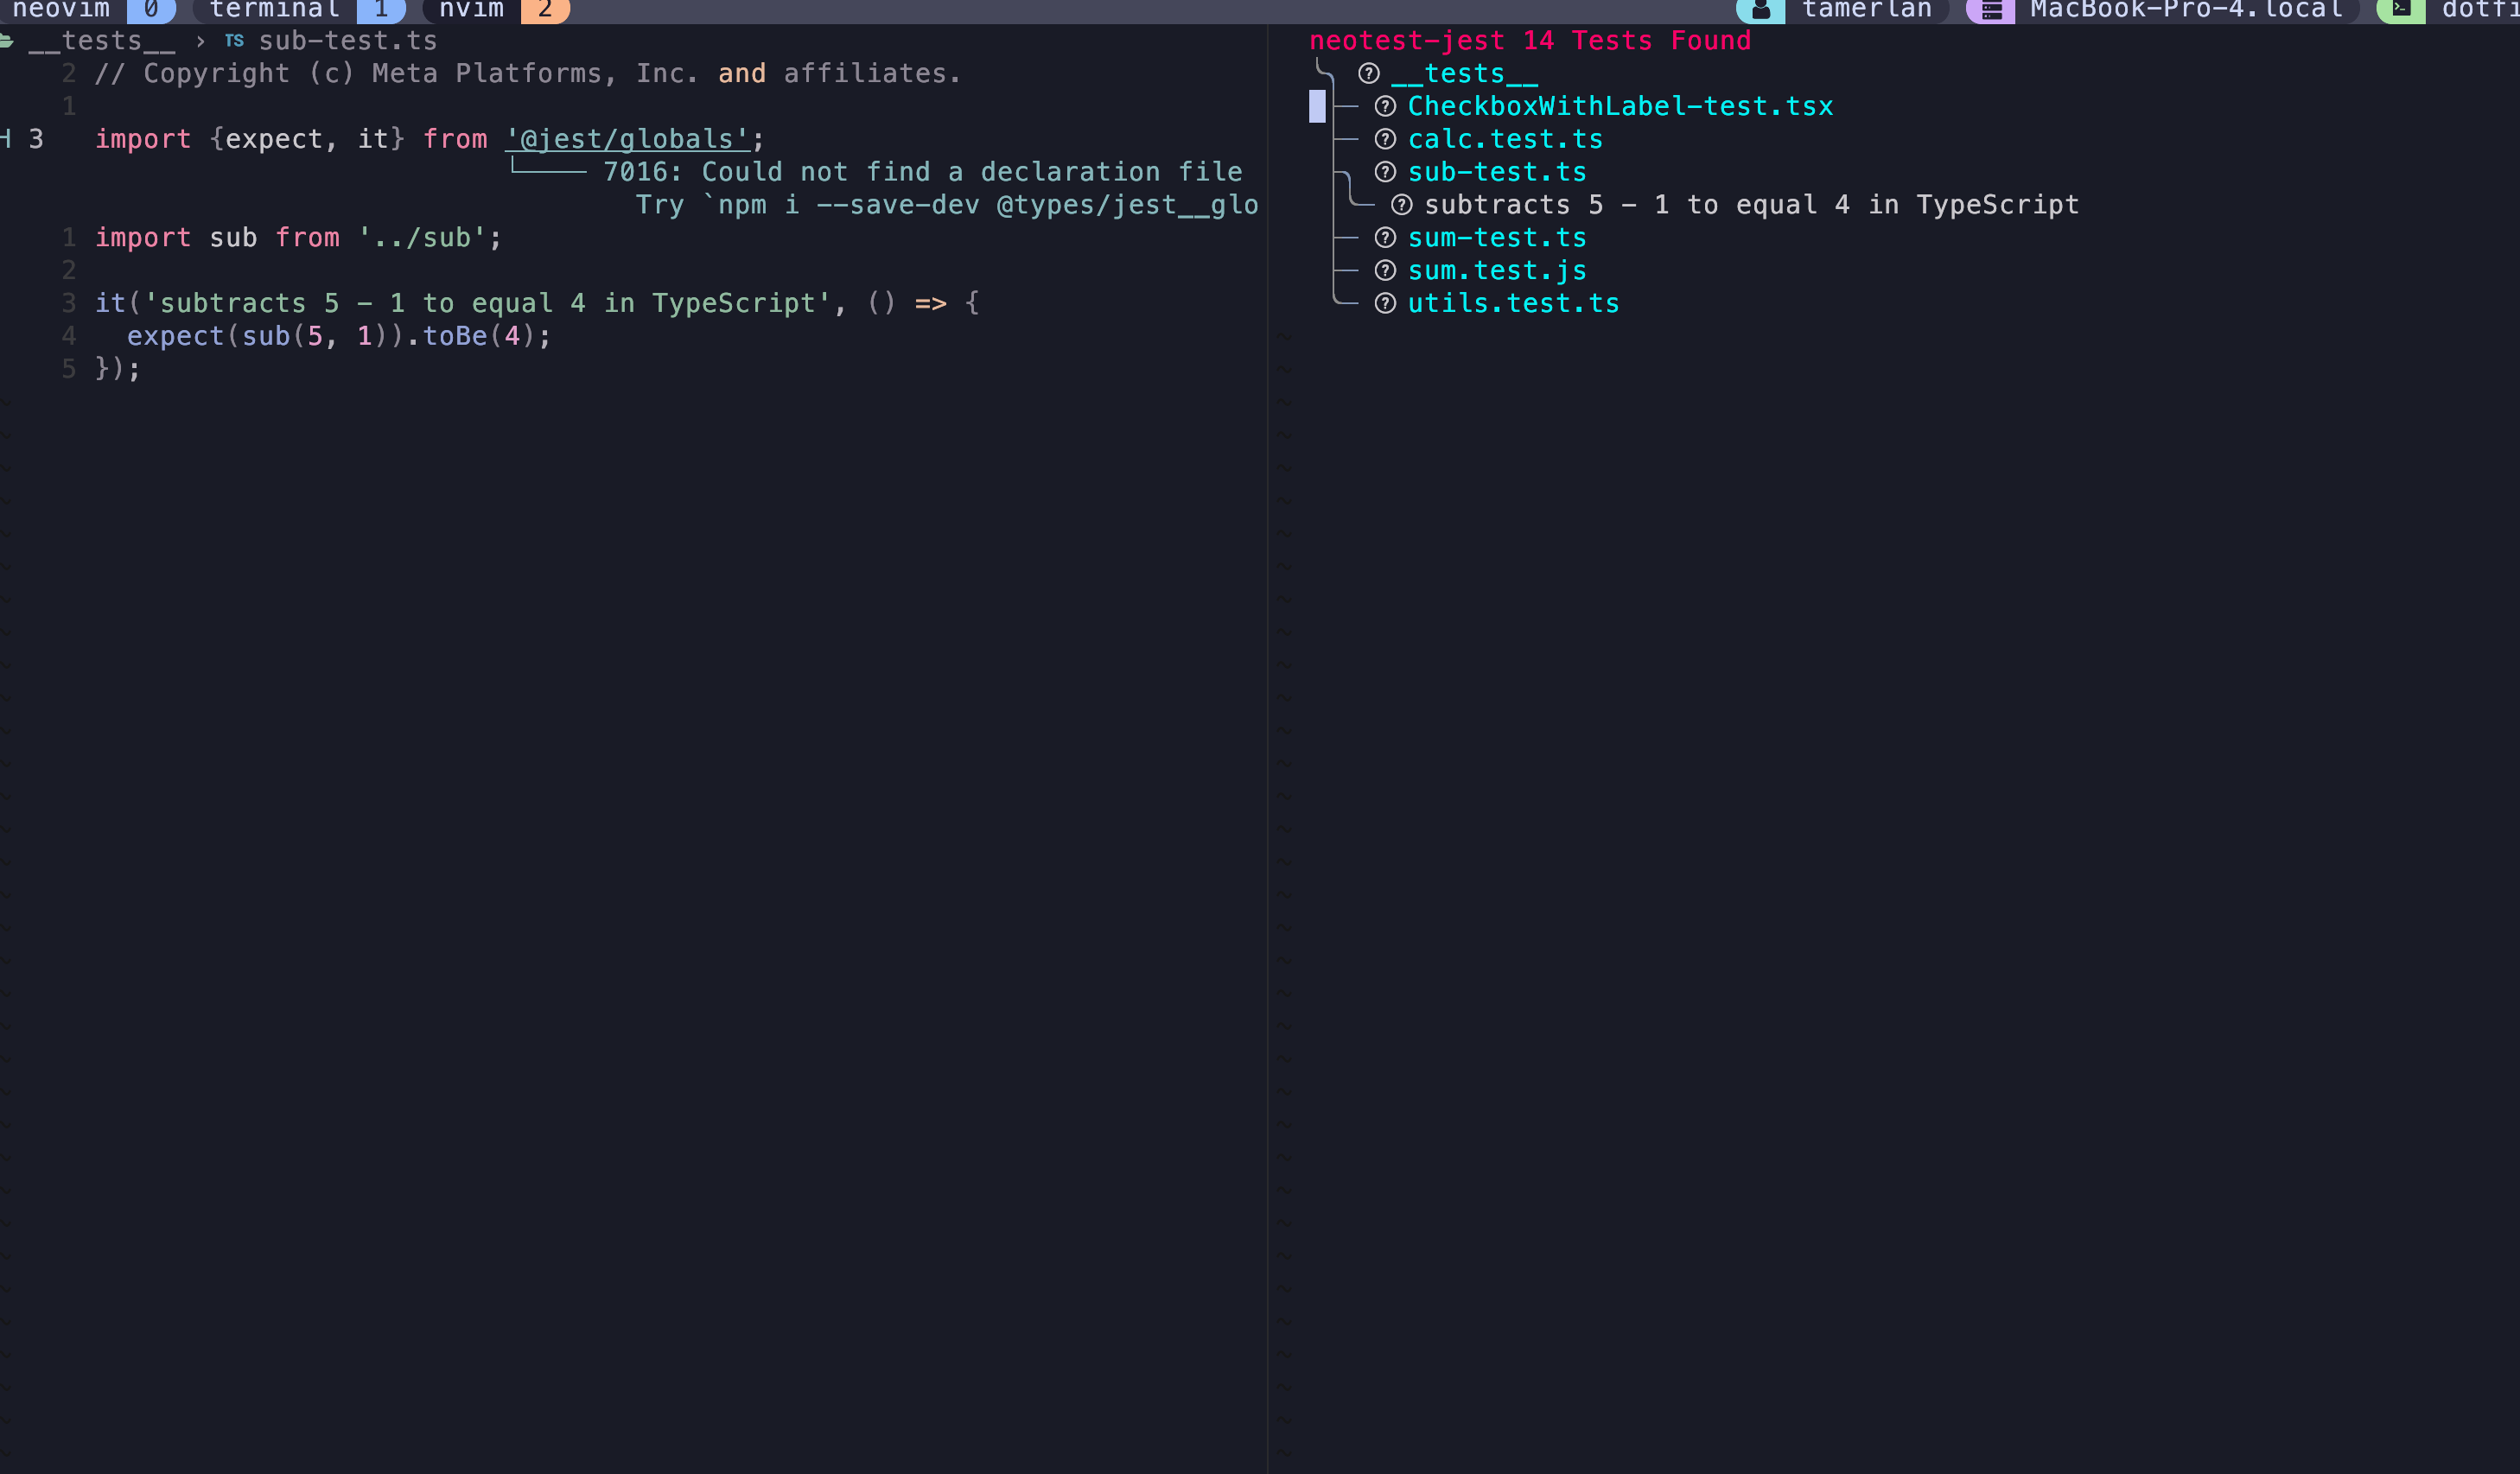
Okay, next I want to see the test summary page and see all my tests at once. We can do that with the keymap <leader>nv. Here's how it looks:
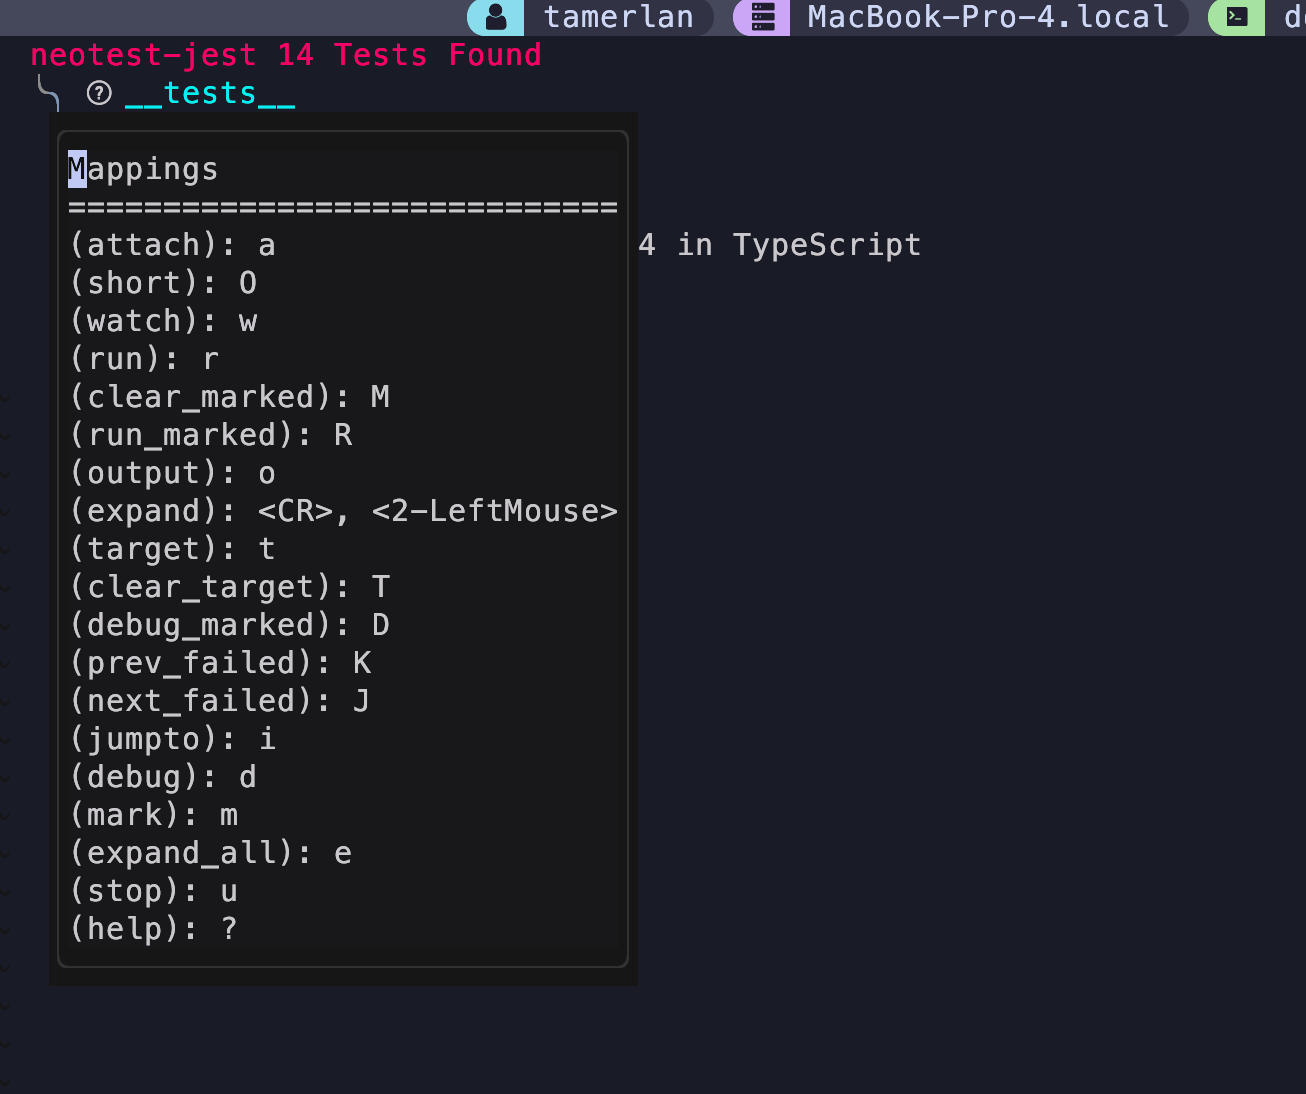
When I press ? it will show me all the available keymaps I have.
I want to run all my tests now, we can run them all using the keymap <leader>na. Let's run all the tests and see what happens to the summary page.
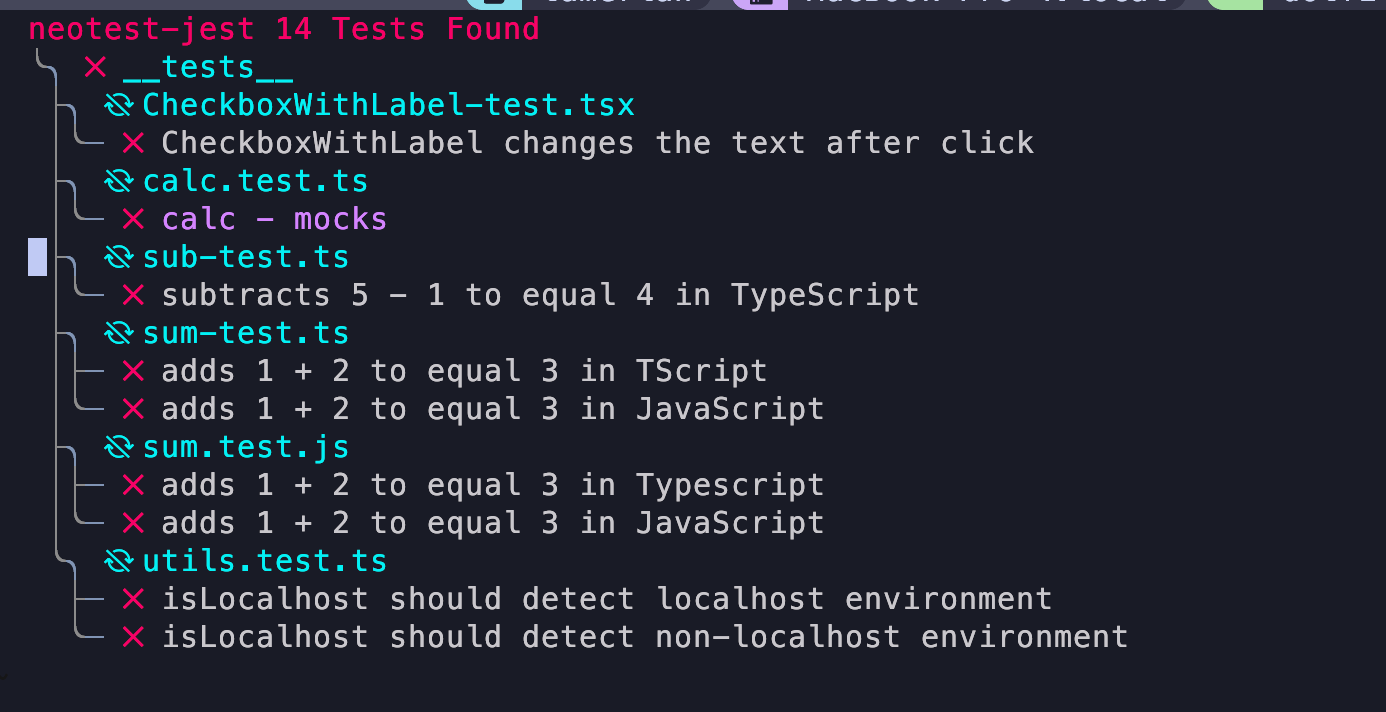
Seems like all my tests are failing and I have to go and fix some stuff. But that's not the point of the article.
Conclusion
I hope you have a working test set up within Neovim by now. Always remember to check out the docs for both Neotest and any adapters you have.
If you have any questions or concerns, leave them in the comments and I'll try my best to help you.
Thanks for reading.
No spam, no sharing to third party. Only you and me.
Member discussion